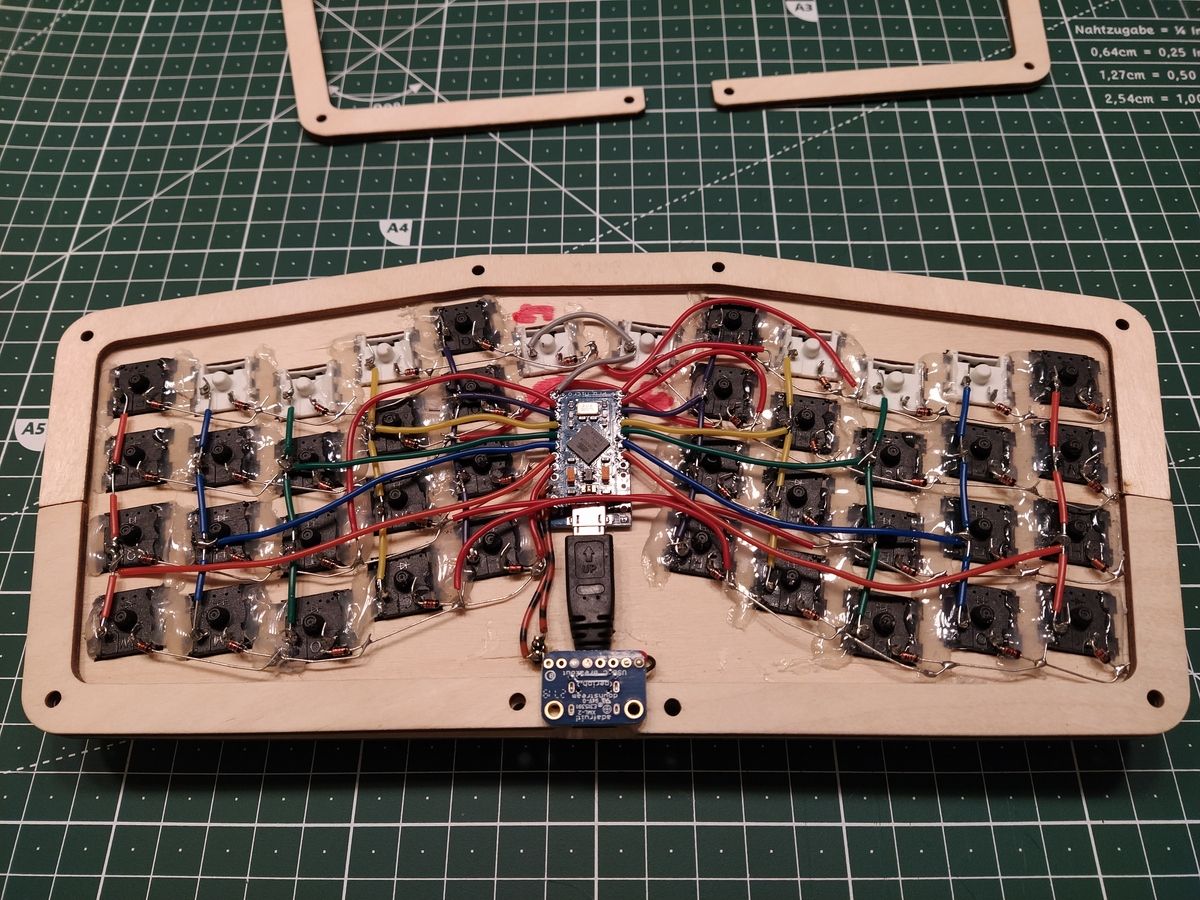
This post belongs to the Atreus build series, which was introduced by Onward with the Atreus keyboard.
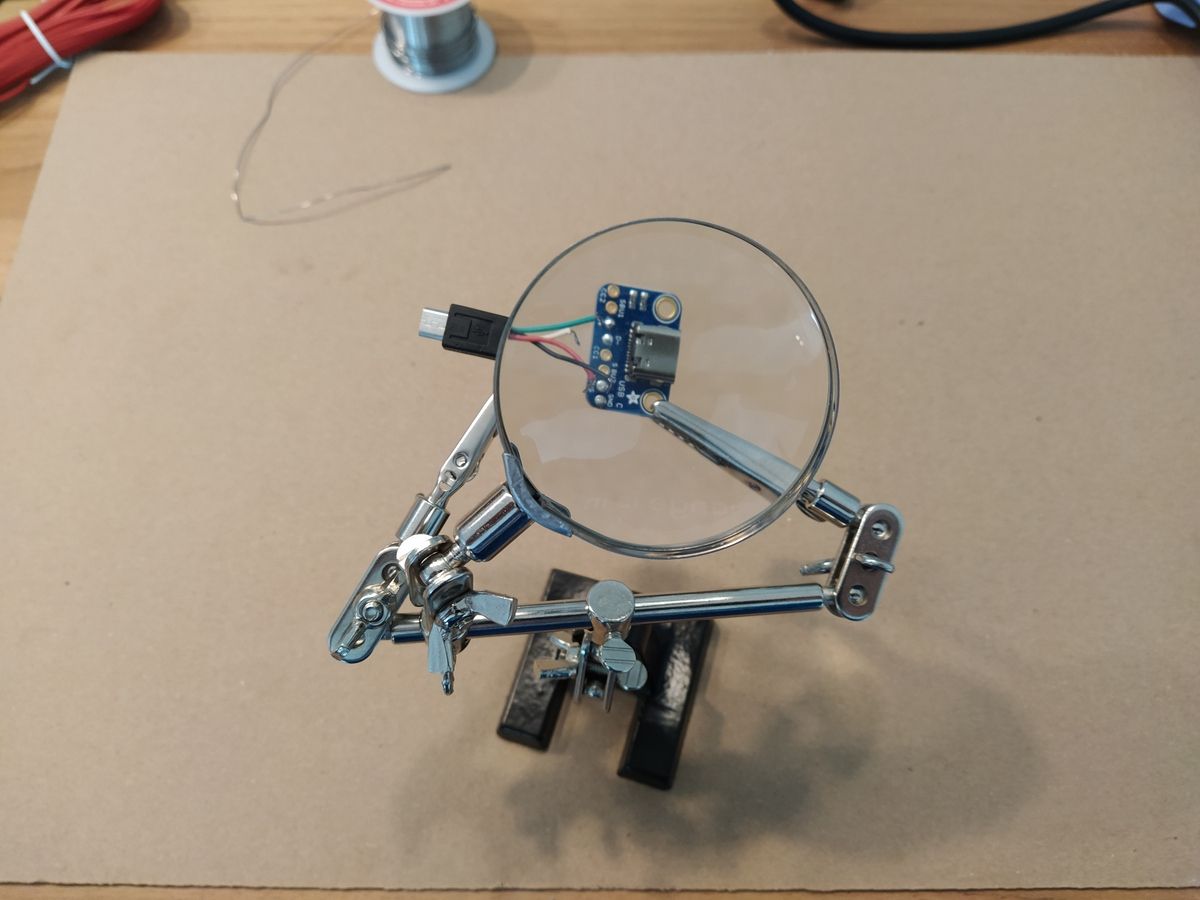
The breakout board will give a USB-C socket to the Atreus, much nicer to use than an old —though still omnipresent— micro-B socket. The breakout board I am using (from Adafruit) takes care of preparing the signals to force the USB-C end as a downstream device through a set of properly placed resistors. (Downstream devices means it must be connected to a host device, it cannot function on its own or be a host itself.)
All that is left for me to do is to rip a USB cable with a micro-B plug end that will connect the breakout board to the Pro Micro controller. And be mindful of the connector enclosure thickness as it must fit inside the casing, which in my case gives me 6 millimetres clearance.
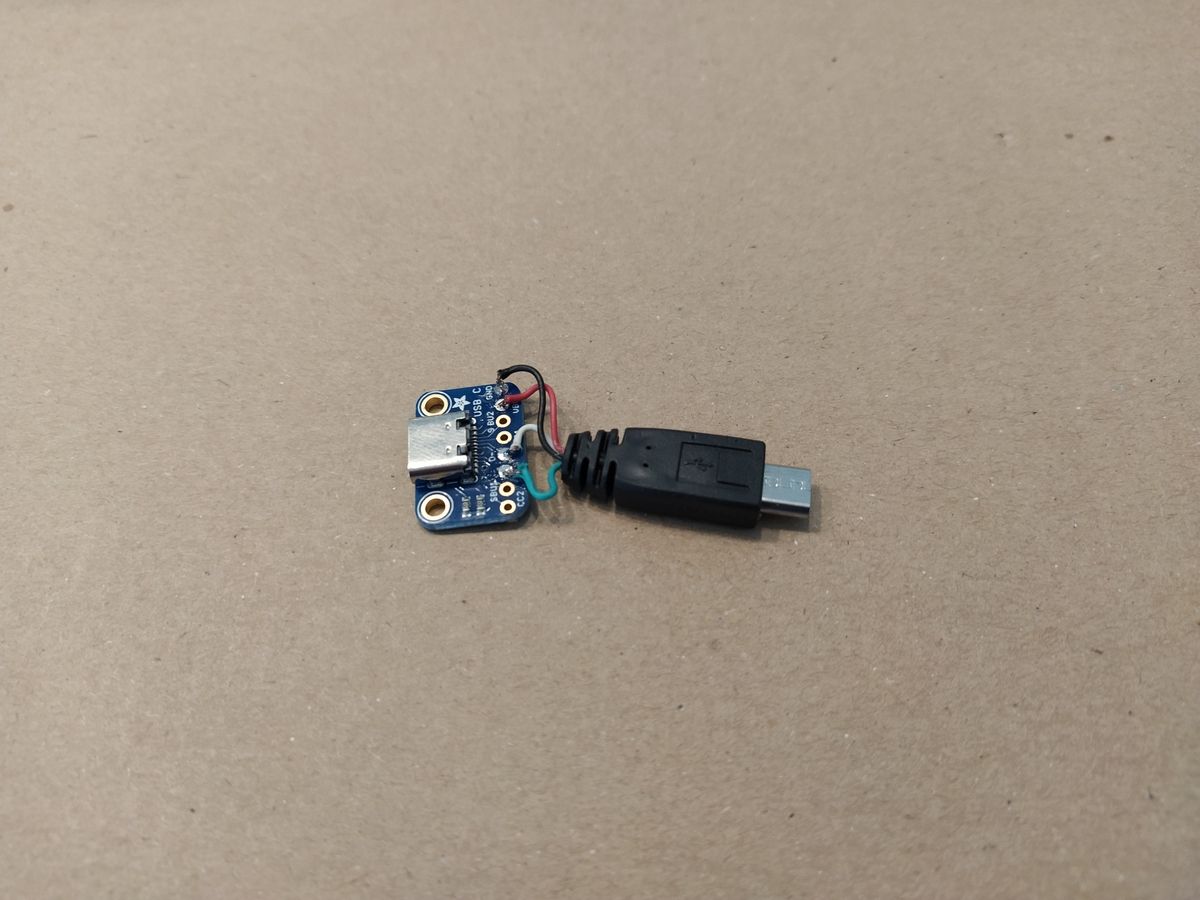
Once that is done, the micro-B plug can be connected to the Pro Micro and the casing assembled.
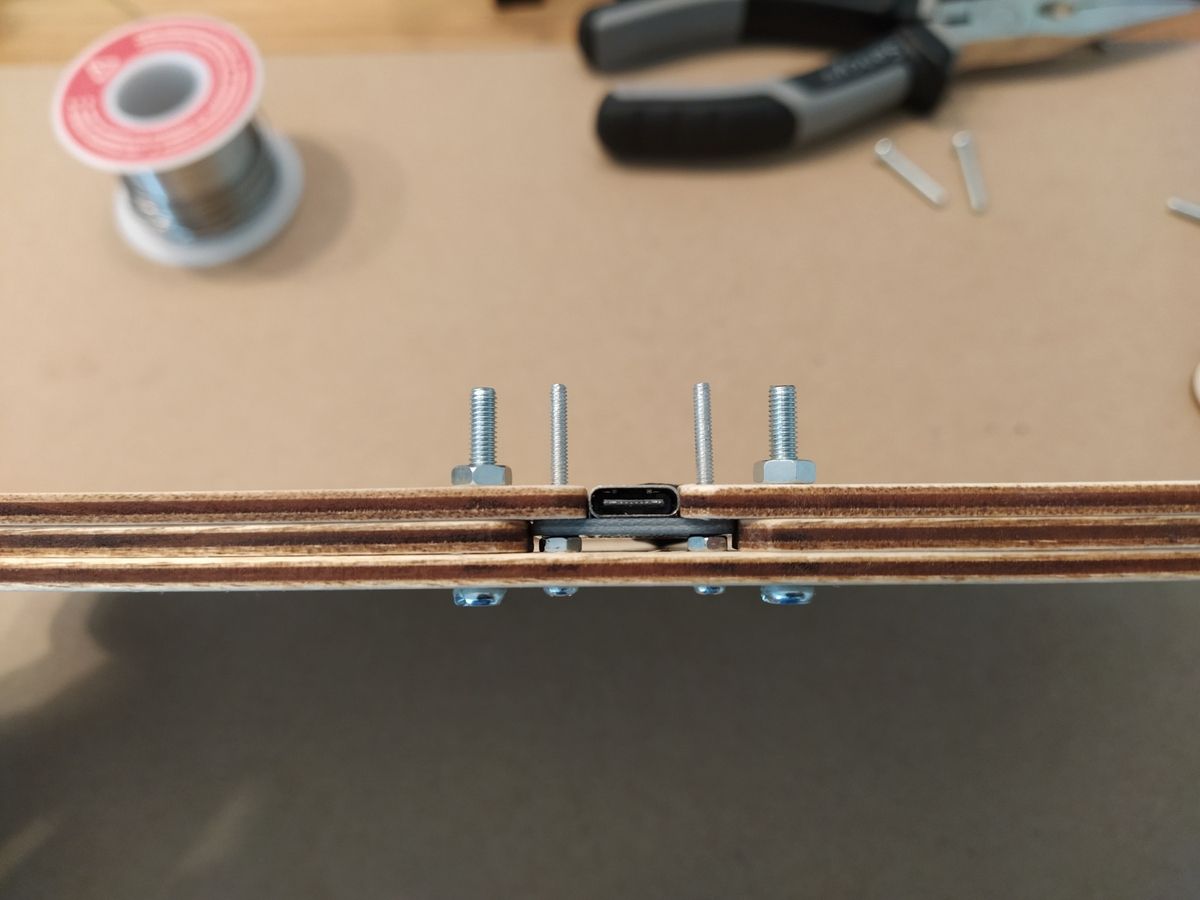
Edit: And a picture of the how the breakout board is tightly fitting at the edge of the casing. This gives a bit more perspective as to why the USB plug wires were cut so short.